Yellow Spot Projector – Troubleshooting and Solutions!
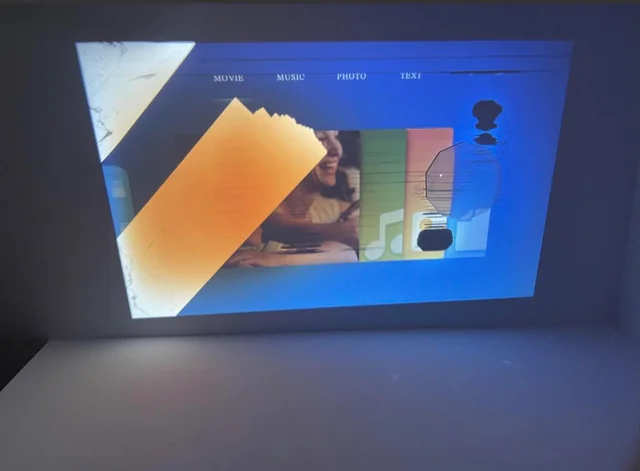
Projectors have become indispensable for both professional presentations and home entertainment. However, encountering issues like a yellow spot on the projected screen can be frustrating.
The presence of a yellow spot on a projector can be due to, such as a malfunctioning bulb, Dust accumulation on the lens or internal components, deteriorating LCD panels, or issues with colour calibration may also contribute to the appearance of a yellow tint on the projected image.
In this comprehensive guide, we will explore various strategies to troubleshoot and resolve the infamous yellow spot on your projector.
How Do You Fix A Yellow Screen On A Projector? – Easy Proven Solutions!
First Of All, Fix The malfunctioning bulb
A yellow spot may appear if the projector bulb is malfunctioning or nearing the end of its life. Check the bulb for any signs of damage or irregularities. If it’s old or showing signs of wear, replacing the bulb is a straightforward solution.
Then, Adjust color settings
Calibrating the color settings is a crucial step in eliminating a yellow tint. Access the projector’s menu and fine-tune color temperature, saturation, and hue until you achieve a balanced and natural color reproduction. To Do This, You Need To Follow;
- Access the Menu: Use the remote control or onboard buttons to access the projector’s menu.
- Navigate to Color Settings: Look for a section in the menu related to color settings, often labeled as “Color,” “Image,” or “Picture.”
- Fine-tune Color Temperature: Adjust the color temperature settings to control the warmth or coolness of the colors. Higher values add warmth, while lower values add coolness.
- Adjust Saturation: Find the saturation or color intensity settings. Increase or decrease the saturation to control the vividness of colors. Higher values result in more vibrant colors.
- Fine-tune Hue: If available, adjust the hue settings to refine the overall color balance. This helps in achieving a natural and balanced color reproduction.
- Save Changes: Once you’ve made the desired adjustments, navigate to an option like “Save” or “Apply Changes” to store the new color settings.
Keep in mind that the exact steps may vary depending on your projector model. Refer to your projector’s user manual for specific instructions tailored to your device.
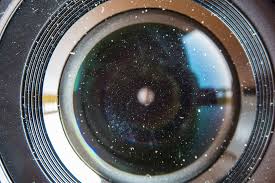
Take A Look To Projector’s optics
Inspect the projector’s optics, including the lens and mirrors. Dust or smudges on the lens can distort the color projection. Use a soft, lint-free cloth to carefully clean the lens and ensure optimal clarity.
Replace the LCD Panels (Especially the Blue One)
LCD panels, responsible for producing colors, can degrade over time. The blue LCD panel is particularly susceptible to deterioration. If you observe discoloration, consider replacing the LCD panels to restore accurate color reproduction.
The emphasis on replacing the blue LCD panel is due to the RGB (Red, Green, Blue) color model commonly used in projectors. The blue LCD panel plays a significant role in producing a wide spectrum of colors, and its deterioration can lead to color irregularities, including a yellow tint.
Also, The blue panel contributes to achieving a balanced and accurate color reproduction. Since a yellow spot indicates color imbalance, replacing a degraded blue LCD panel can help restore proper color representation. Now in order to replace it, You have to follow the guidelines mentioned below:
- Identify the Panel: Locate the blue LCD panel using the projector’s manual for guidance.
- Power Off: Ensure the projector is off and disconnected for safety.
- Access Components: Remove the casing to access internal parts.
- Locate Panel Housing: Identify the compartment housing the blue LCD panel.
- Disconnect and Remove: Carefully disconnect cables and remove the panel, noting its orientation.
- Install New Panel: Place the new blue LCD panel securely, following manufacturer instructions.
- Reassemble and Power On: Securely reassemble the projector, power it on, and test for improved image quality.
Clean the lens smudges or dust particles
Regular maintenance is essential. Dust particles or smudges on the lens can affect the quality of the projected image. Clean the lens periodically using a lens cleaning kit to ensure a clear and vibrant display.
Get New Polarizer
The polarizer plays a crucial role in controlling light polarization within the projector. If it’s damaged or aging, it can result in color irregularities. Investing in a new polarizer can significantly enhance image quality.
Replace the blown or dying lamp
If the projector lamp is flickering or showing signs of dimness, it’s likely reaching the end of its life. Replace the lamp with a new, compatible one to maintain optimal brightness and color accuracy. To do this, you Have to Check Out Our Detailed Article On “Projector Lamp Is Blown”
Check the filter And Clean it properly
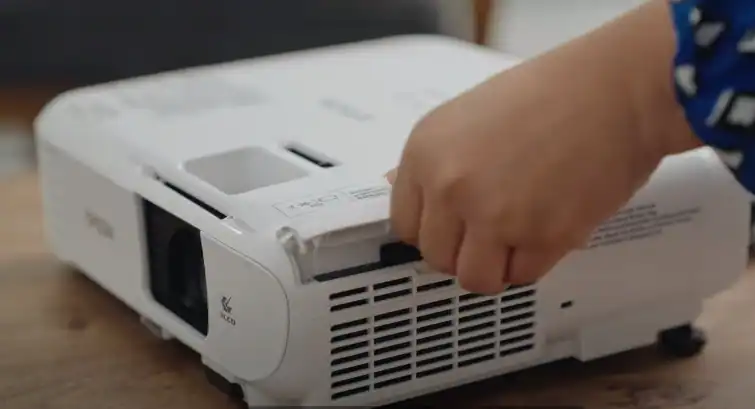
Projectors have air filters that prevent dust from entering sensitive components. A clogged filter can cause overheating and affect color projection. Regularly check and clean the filters according to the manufacturer’s guidelines.
Change the Color Wheel
A color wheel is a crucial component in DLP (Digital Light Processing) projectors. It is a rotating disc with segments of different colors—typically red, green, blue, and sometimes white or yellow. As the wheel spins, these colors are sequentially projected onto the screen, producing the full spectrum of hues required for image reproduction.
Over time, color wheels can degrade, leading to inaccuracies in color reproduction. Replacing a worn-out color wheel ensures accurate and vibrant colors in your projected images. Also A malfunctioning color wheel may cause color distortions, such as the appearance of unwanted tints or shadows. Replacing it can rectify these issues and improve overall image quality.
Contact the Manufacturer
If all else fails, reaching out to the manufacturer’s customer support or technical service is a prudent step. They can provide expert guidance, troubleshooting assistance, or recommend further actions based on your projector model.
But Why is my projector showing a yellow spot? – Reasons!
| Bulb Issues | Lens Contamination | Polarizer Damage |
| LCD Panel Deterioration | Color Calibration Problems | Color Wheel Malfunction |
| Filter Contamination | Burnt LCD Pixels | Lens Aberrations |
| Internal Component Wear | Aging Components | Calibration Issues |
So, By identifying the specific cause and applying the appropriate solutions, users can restore optimal image quality and enjoy a vibrant, colour-balanced projection from their projectors.
Why Is There a Projector Dark Spot? – Fix It ASAP!
A projector dark spot refers to an area on the screen where the projected image appears darker than the surrounding areas. This issue can arise due to factors such as dust accumulation on the lens or internal components, scratches or damage to the projector lens, or the ageing of critical internal elements like the color wheel or DLP chip. For further details and solutions to this issue, You can redirect to our guide over “Projector Dark Spot” and get rid of such strange problems quickly.
Frequently Asked Questions:
How do you fix a burn spot on a projector?
Repairing a burn spot can be challenging. If the burn is on the lens or internal components, consult the manufacturer or a professional technician for proper guidance and potential solutions.
Why Is There Halo Effect From Projector to screen?
The halo effect from a projector to the screen often occurs due to improper calibration or lens issues. Adjusting the projector’s calibration settings or cleaning the lens to remove smudges can fix.
Why does my projector have an orange spot?
An orange spot on your projector may result from color calibration issues. Revisit the color settings and ensure proper calibration for accurate color reproduction, helping to eliminate the unwanted orange tint on the projected image.
To Sum Up The Discussion:
Addressing the yellow spot on your projector involves a systematic approach, from checking the bulb to understanding the root causes. Regular maintenance, proper calibration, and timely replacement of aging components are key to ensuring a vibrant and clear projection.
If uncertainties persist, reaching out to the manufacturer or seeking professional assistance is always a prudent choice. With these troubleshooting strategies, you can enjoy an optimal viewing experience from your projector.