How To Fix Burn Spot On Projector – 8 Validated Solutions!
To fix the burn spots on the projector try gently cleaning the affected areas with a microfiber cloth. Inspect the projector’s optics for any damage or foreign objects that may be causing the burn spot. Clean or repair as needed.
While working with a projector you need to learn how a projector usually works, and what is the actual thing that causes burning spots in it. I’m sure that, In this complete guide, you will learn what causes burning in projectors, and how to fix burn spots on projectors.
What is Burning In A Projector? – Some Basics To Clear!
Nowadays projectors are not likely to burn that easily but sometimes yes projectors do burn and leave blackish or brownish spots on the screen which cause image distortion and discomfort in its display.
There are different names for burn-in which are also called image retention, image persistence, a sticking image, or also a ghost image. If you guys are having any of these then Tie your knots because you need to stick with us till the end!
What causes the burn spot on the projector? – Reasons You Need To Check!
| Overheating | Leaving projector outside |
| Damaged LCD | The old lamp of the projector |
| Burnt polarising film glass | Dust lens |
| Dirty LCD | Broken DMD chip |
Polarization of Materials on the LCD Panel: Uneven polarization on the LCD panel can lead to irregular light transmission, contributing to burn spots. Ensuring proper polarization of materials is vital for maintaining image quality.
Overheating: Prolonged usage or inadequate ventilation can cause components to overheat, leading to burn spots. Additionally, the excessive heat generated can contribute to uneven light distribution.
Dust Accumulation: Buildup of dust on the projector’s optics, especially the lens, can contribute to burn spots over time. Moreover, accumulated dust particles may scatter light unevenly, exacerbating the issue.
Faulty Bulb: A malfunctioning or old bulb may emit uneven light, resulting in burn spots on the projected image. Consequently, replacing the bulb with a new and properly functioning one is essential.
Lens Damage: Scratches or damage to the projector lens can distort light, causing burn spots in the projected display. Addressing lens issues, such as repairs or replacements, can help alleviate this problem.
Incorrect Installation: Improper installation of the bulb or other components may lead to uneven light distribution and burn spots. It’s crucial to follow manufacturer guidelines during installation to ensure optimal performance.
Projection Surface Issues: A damaged or reflective projection surface can affect the way light is dispersed, causing burn spots. Using a high-quality and properly maintained projection surface can mitigate this issue.
Internal Component Failure: Issues with internal components, such as the color wheel or light engine, can result in uneven light projection and burn spots. Regular maintenance and timely replacement of faulty components can prevent such problems.
Therefore, the burn-in is permanent on the projector and is not likely to be recovered. Unfortunately, you have to change the projector if it is a burn-in but in case of image retention there’s no need to change the projector also there’s a question of how to distinguish between Burn-in and image retention.
How To Avoid These Burning Spots? – Few Things To Look!

- Keep it always clean and prevent dirt.
- Get the best position to place it.
- Always adjust its settings
- After using it remember to turn it off.
Let me explain all these factors for your proper understanding and complete knowledge, so that you can proceed easily.
Cleaning it regularly:
For the proper functioning of the projector and its better quality of it, it is important to keep your device and its lens neat and clean.
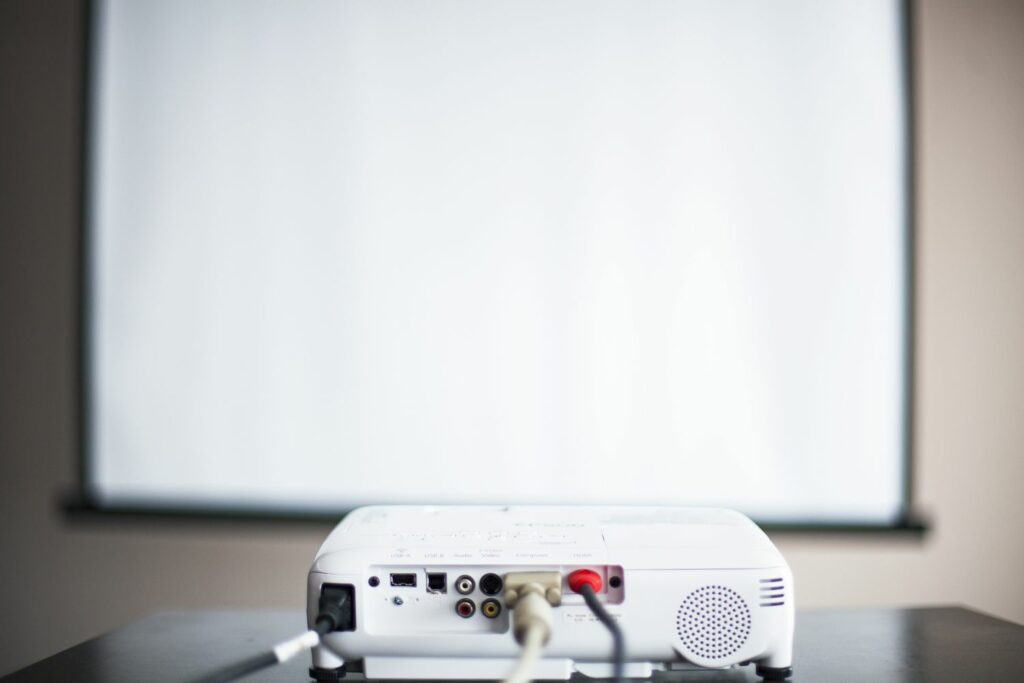
Cleaning a projector is a crucial factor in keeping it steady and long-lasting for this purpose first you have to turn off your projector and unplug it from the circuit board. Now you need to use a soft lint microfiber cloth and gently clean the external area of the projector and also its lens.
For the cleaning of small dust particles, you need to use a can of compressed air or a brush and gently blow it on the targeted areas and timely inspect its overheating cleaning it regularly helps to make its functioning better.
Cleaning the DMD chip:
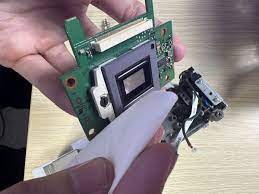
If you’re noticing dark spots on the screen remove the lamp cover and unscrew the projector case and then flip the projector undo the bottom screw and remove the top and back covers.
Move ribbon cables, take out the main circuit board, and undo the metal brackets then use a screwdriver to remove the lens assembly. Access the DMD by removing the head stink if the DMD is damaged and reach an expert.
Positioning it properly:
During the usage of the projector keep it away from other electronics for proper ventilation.
The other factor is to select an appropriate position for the working of your projector where it is easy for its function and it doesn’t get harmed. Thus, the suitable position is to place it at a point where it dosent get in touch with the other electronics or any other material so that it can get proper air ventilation that also prevents it from overheating.
Adjusting its settings:
Always select a proper guide through the remote by selecting its options like “Standby,” “Sleep,” or “Eco”.
For the proper working of a projector, select the right options so that it can work according to our required directions, and we can get our expected results.
Turning it off:
The most important factor to avoid burning is always turning it off after use.
After the use of the projector, it is important to always keep a reminder to turn it off these methods can help us to prevent it from heating and causing burn-in and image retention of total blackout.
Checking the screen:
It’s important to identify that the image issue is from your projector and not your screen. Sometimes there might be a few burn-ins or errors inside the projector. If you turn off your projector, you should be able to see if any of the spots remain on the screen. If so, it is a screen issue. To figure it out, You need to Follow the below-mentioned Guidelines.
Step 1: You have to turn the projector upside down for the purpose of it.
Step 2: If you find a product label remove it.
Step 3: Get a screwdriver and for the precautions of your eyes avoid the bright light.
Step 4: For the actual cleaning, wrap a cotton swab around a Q-Tip. Gently use this to clean the LCD panel.
And if you further need an explanation you can watch the tutorial on YouTube video whose link is below.
Fixing the lens:
The next, step is to inspect your lens, which I guess is the vital part.
After Completing the cleaning to see if the dark spots or blurry images disappear. Since this may be image retention instead of burn-in, leave the projector off for a few hours and see if the image recedes.
You need to clean the lens of the projector for this purpose you need to turn off your projector first, and after that carefully clean your projector lens with the help of a thin microfiber cloth which is dipped in alcohol. If you still see dark spots on the screen then it means that there is dirt on the inside of the lens thus, you need to open up your projector and clean the lens from the inside.
Remove the polarizer or Replace the color wheel:
Don’t Tell me you aren’t missing out the checking the Color wheel or the polarizer of a projector!
After checking the lens and the screen of the projector If you confirm your projector has burn-in, then you specifically have to replace the projector’s polarizer, color wheel, and/or other parts to get it back to working condition. Some do-it-yourself (DIY) guides are out there to help get this done, or you can take it to a tech repair shop.
Methods To Identify Burning – How To Recognize Them!
Brun-in:
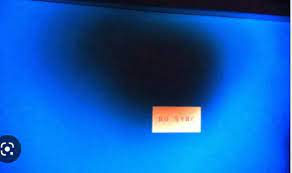
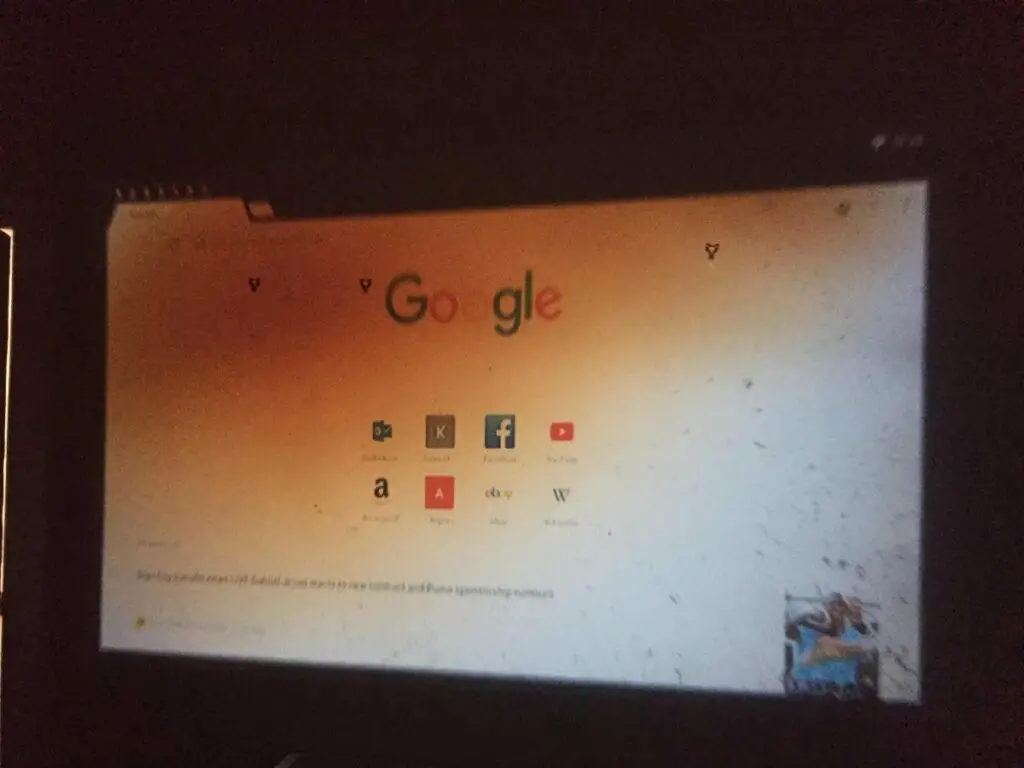
The spots of burn-in are identified by some blackish, brownish, and yellowish types of spots. These spots get bigger from time to time if the images are displayed consistently on the projector they can occur in any corner of the screen and also in the centre.
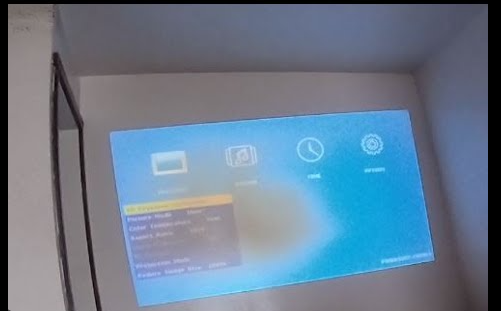
Image retention:
The other name of Burn-in is called image retention also known as image persistence which occurs by the motion of the electrodes. These electrodes tend to move into the projector through the cable and cause the liquid crystal to gather up. As a result, the image is formed to be distorted or blurred.
Frequently Asked Questions:
Can I permanently remove those burn spots or are there software fixes?
Unfortunately, burn-ins are not removable because they are related to the hardware and the available software fixes are limited. Therefore, the only primary ways that are worthy are proper cleaning and maintenance.
Is lowering the brightness a way to prevent the projector from burning?
Lowering the brightness of the projector can be a way to prevent the projector from burning Because burning is somehow related to overheating and in this way, the risk of overheating is reduced.
Are burn spots covered under the projector’s warranty?
It depends on the warranty terms. Check the warranty documentation provided by the manufacturer to determine if issues related to burn spots are covered.
Summing Up The Discussion:
To remedy burn spots on the projector, use a gentle touch to clean affected areas with a microfiber cloth. Additionally, inspect the optics for damage or foreign objects contributing to the burn spot and address with cleaning or repairs as necessary.